How to set up Auto Take Profit


Auto Take Profit is an automation designed to help you automate your exit strategy at your own pace. You can simply set a price at which you want to start to realize some profits and let the automation take over after it has been hit.
Follow these series of steps to set it up with success:
Step 1 - Assess your position and think about your market outlook
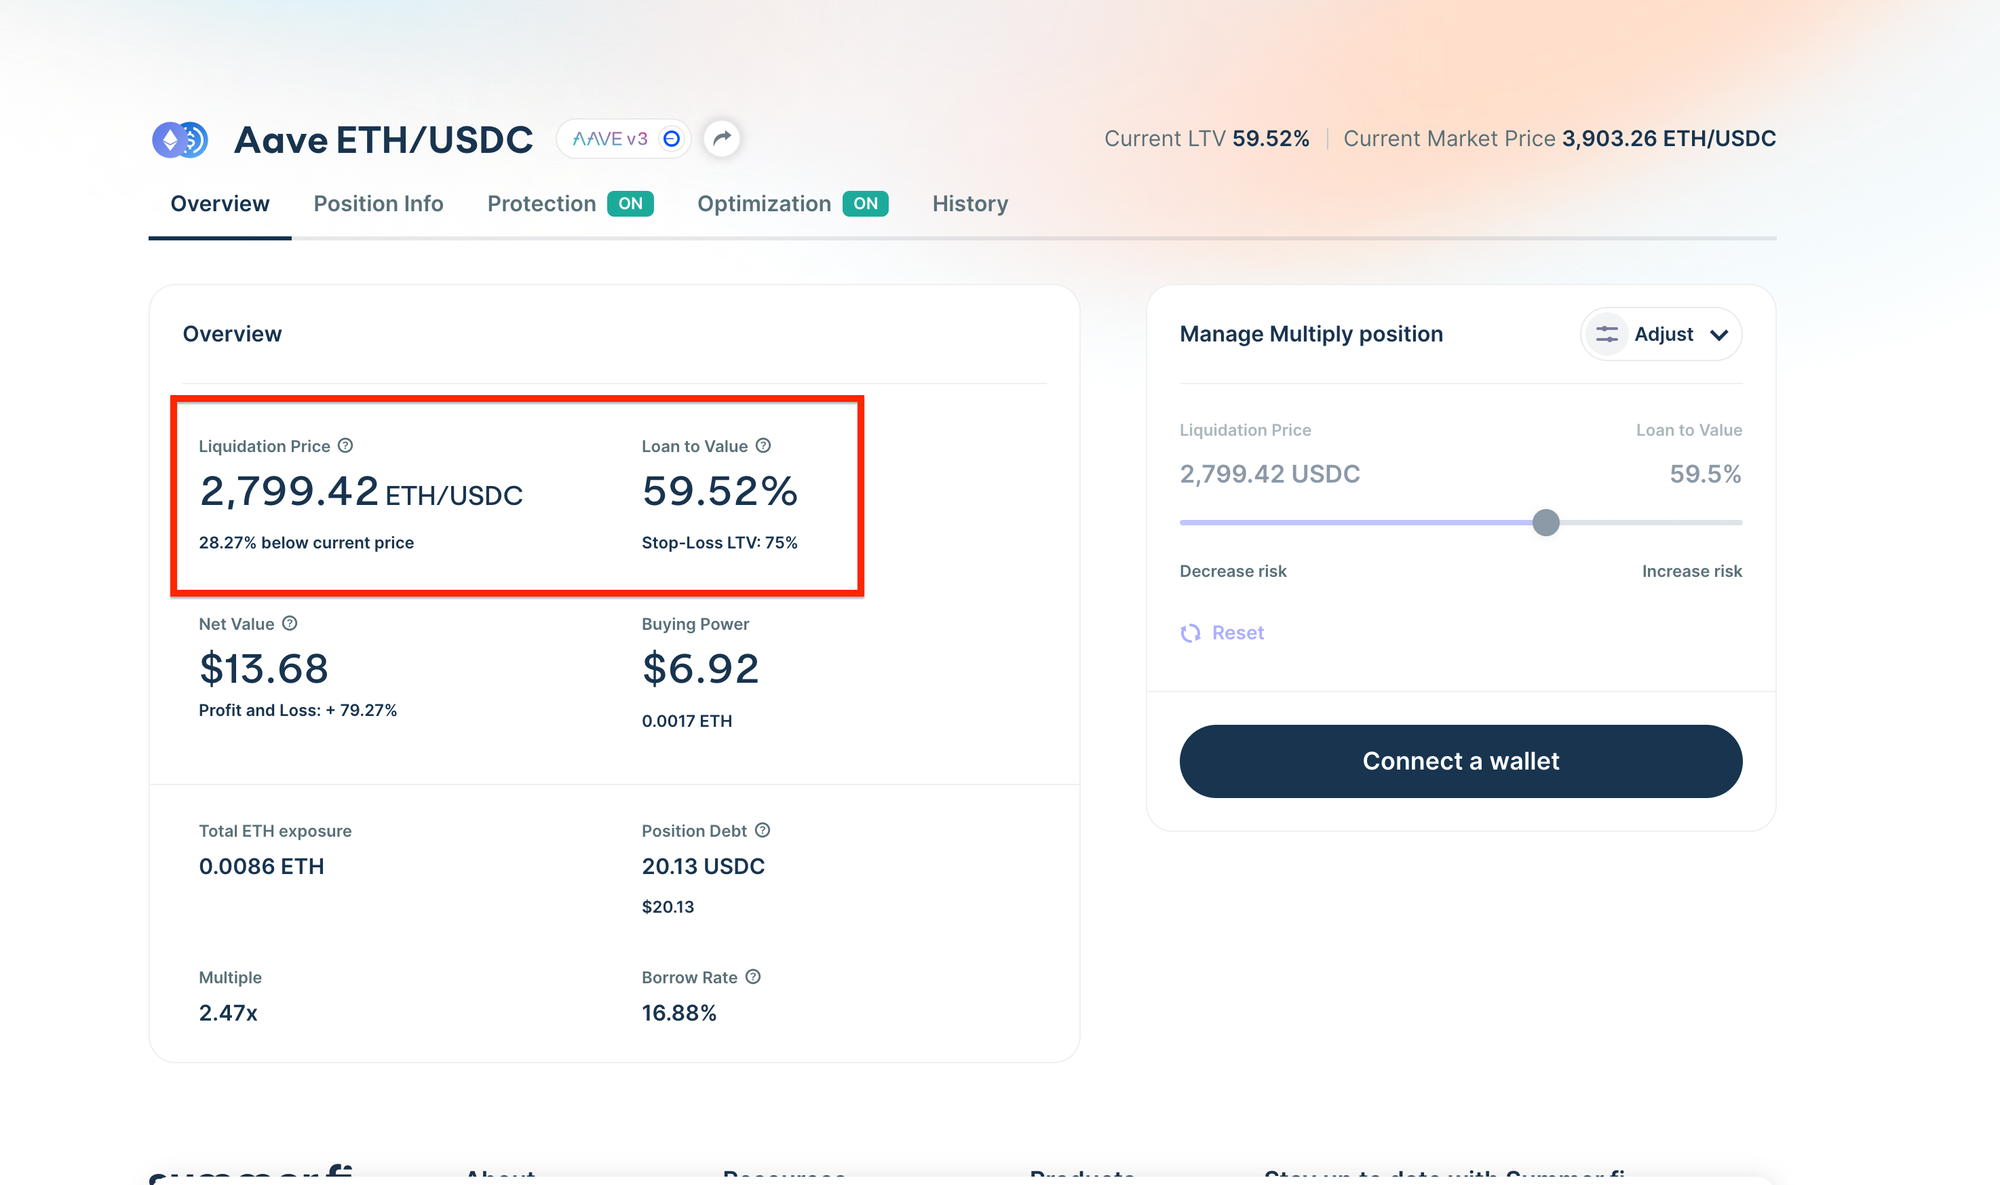
Before navigating to Auto Take Profit, you’ll want to look at your position and familiarize yourself with your key metrics.
- Liquidation Price
- Current LTV
- Stop Loss LTV
Then, you will want to consider the entire market and ask yourself a simple question: Where do I expect this market to go,optimization and at what point would I want to start realizing some profits?
Step 2 - Navigate to the Optimization tab from your open position
Once you have that foundation, simply click on your position's “Optimization tab” and select the “Auto Take Profit” card.
Step 3 - Determine how you’d like to realize profits
The first decision you must make is simple: Do you want to realize profits to collateral or debt?
If you realize profits to collateral, you will simply withdraw collateral to your wallet automatically.
If you realize profits to debt, you will be withdrawing collateral and swapping it for the debt asset, which you will receive in your wallet, automatically.
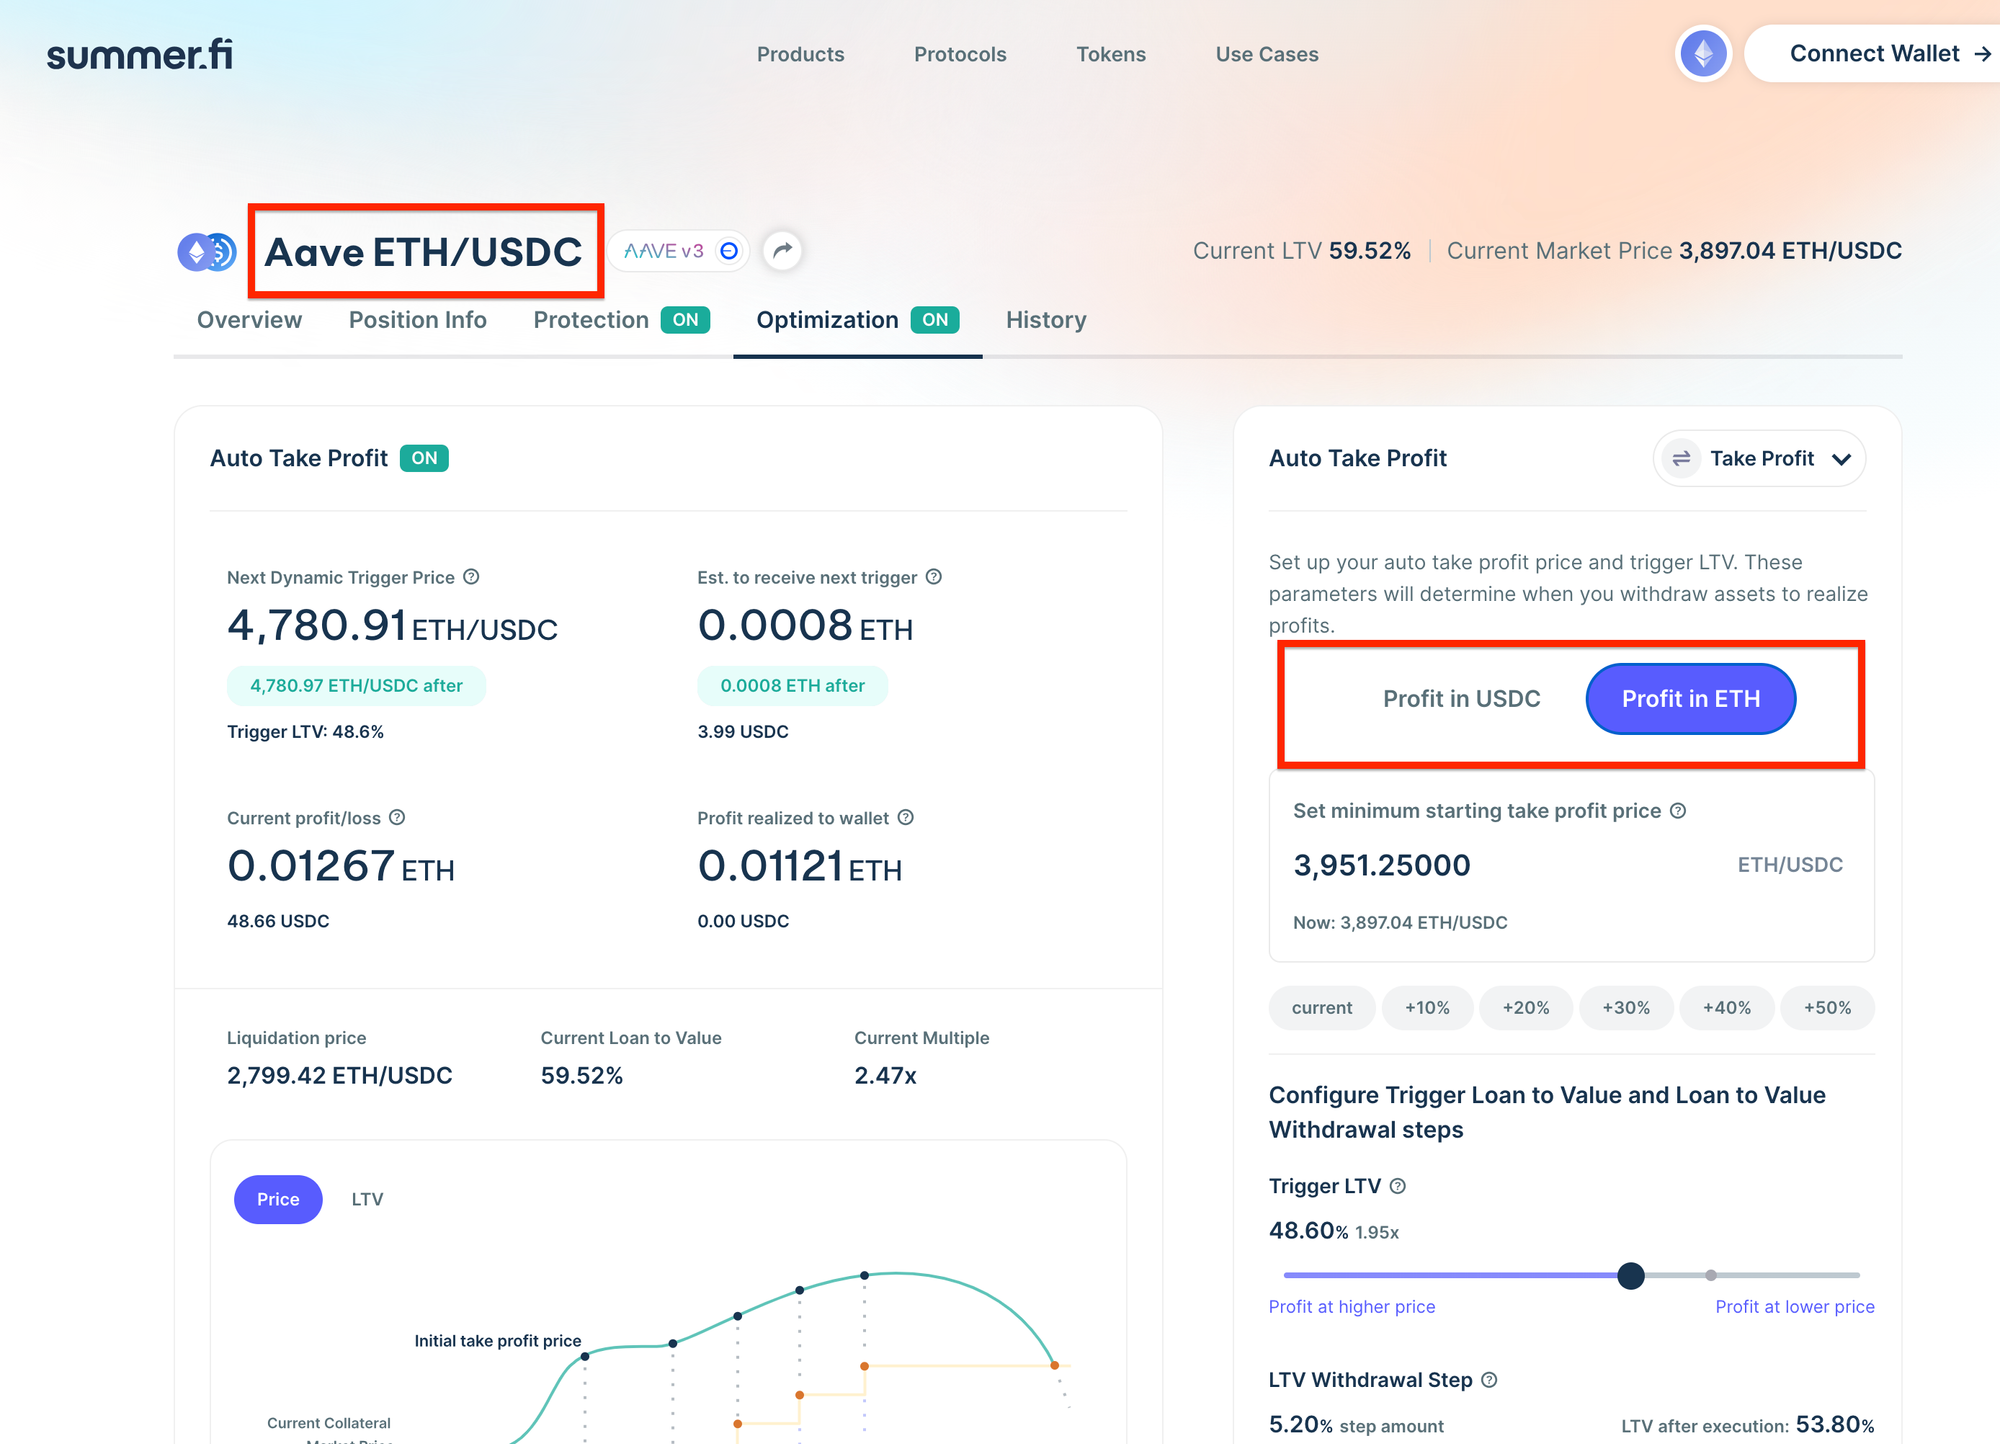
Step 4 - Set your minimum starting take profit price
After you decide if you’d like to realize profits to collateral or debt, you will need to determine when you’d like to start realizing profits.
A simple question to help with this is the simple question of:
- At what price in the future would I want to start realizing some profits from my position?
To do this, type the price into the input box on the right hand side. In the example, it is 8,000 ETH/USD, but you can input any price above the current price. After you input the price, on the left-hand side of the screen, you will be able to see two key Auto Take Profit forecast metrics.
- Your Next Dynamic Trigger Price: Reflects the next price at which you will realize profits.
- Est. to receive next trigger: Forecasts how much profit you will receive denominated in either collateral or debt.
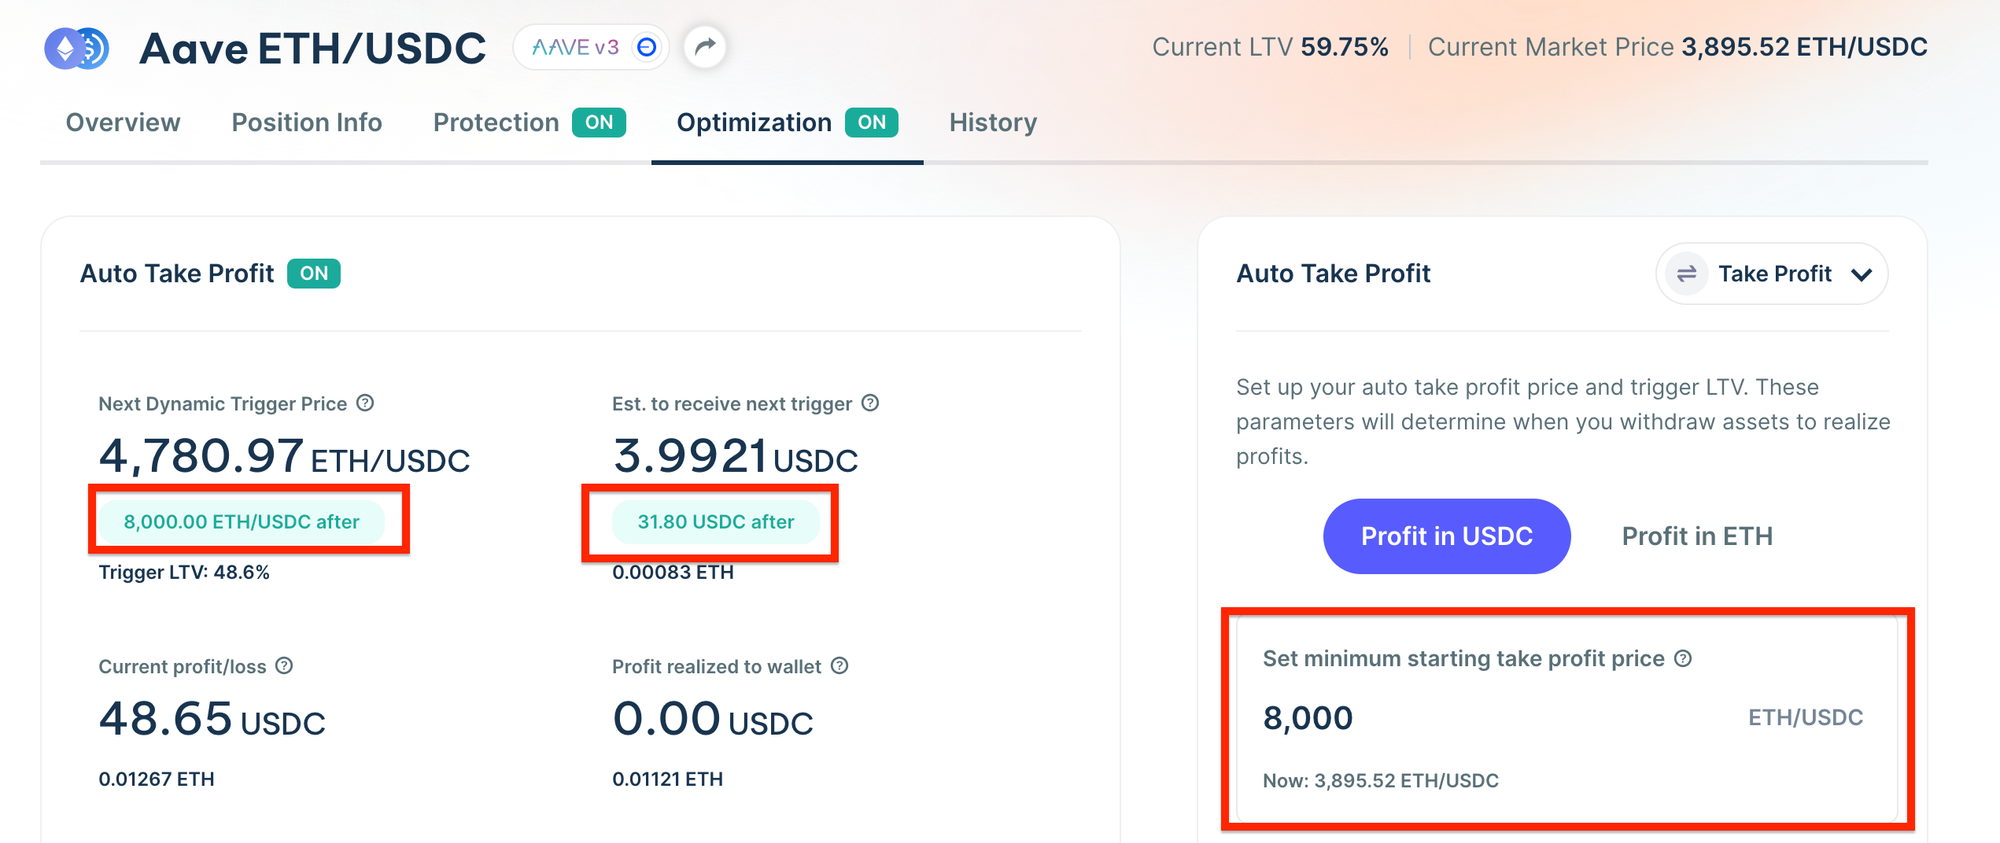
It is essential to note that this price is Dynamic because it can go up if you make changes to your position after setting it up.
So, if you always want it to be the same, you must monitor how it changes after making significant position changes.
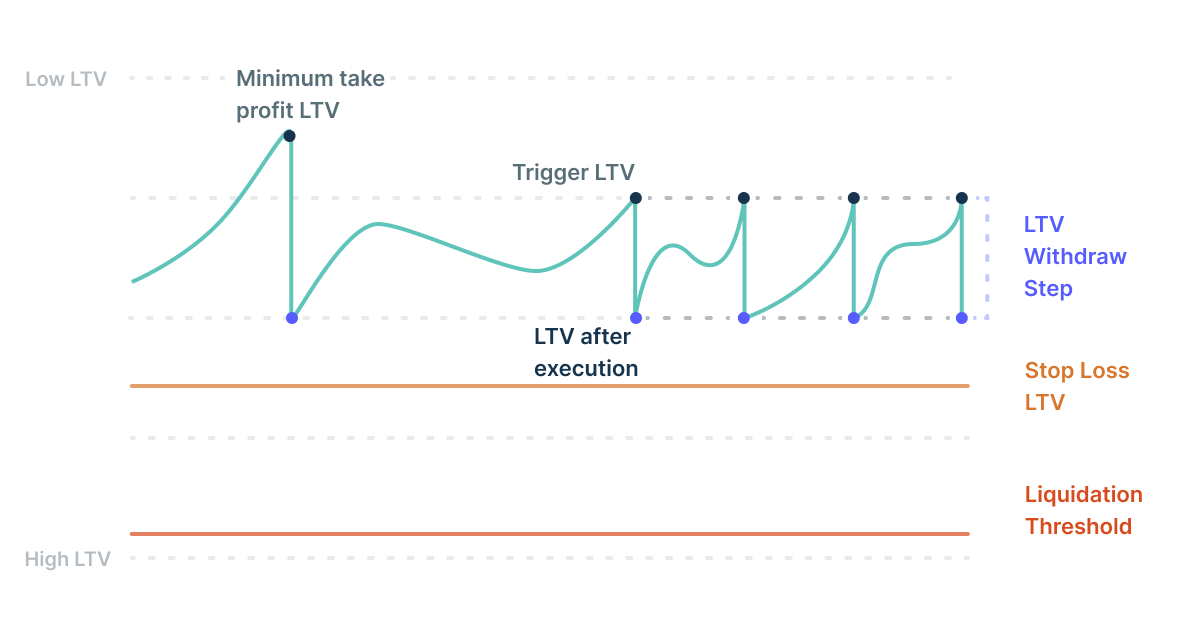
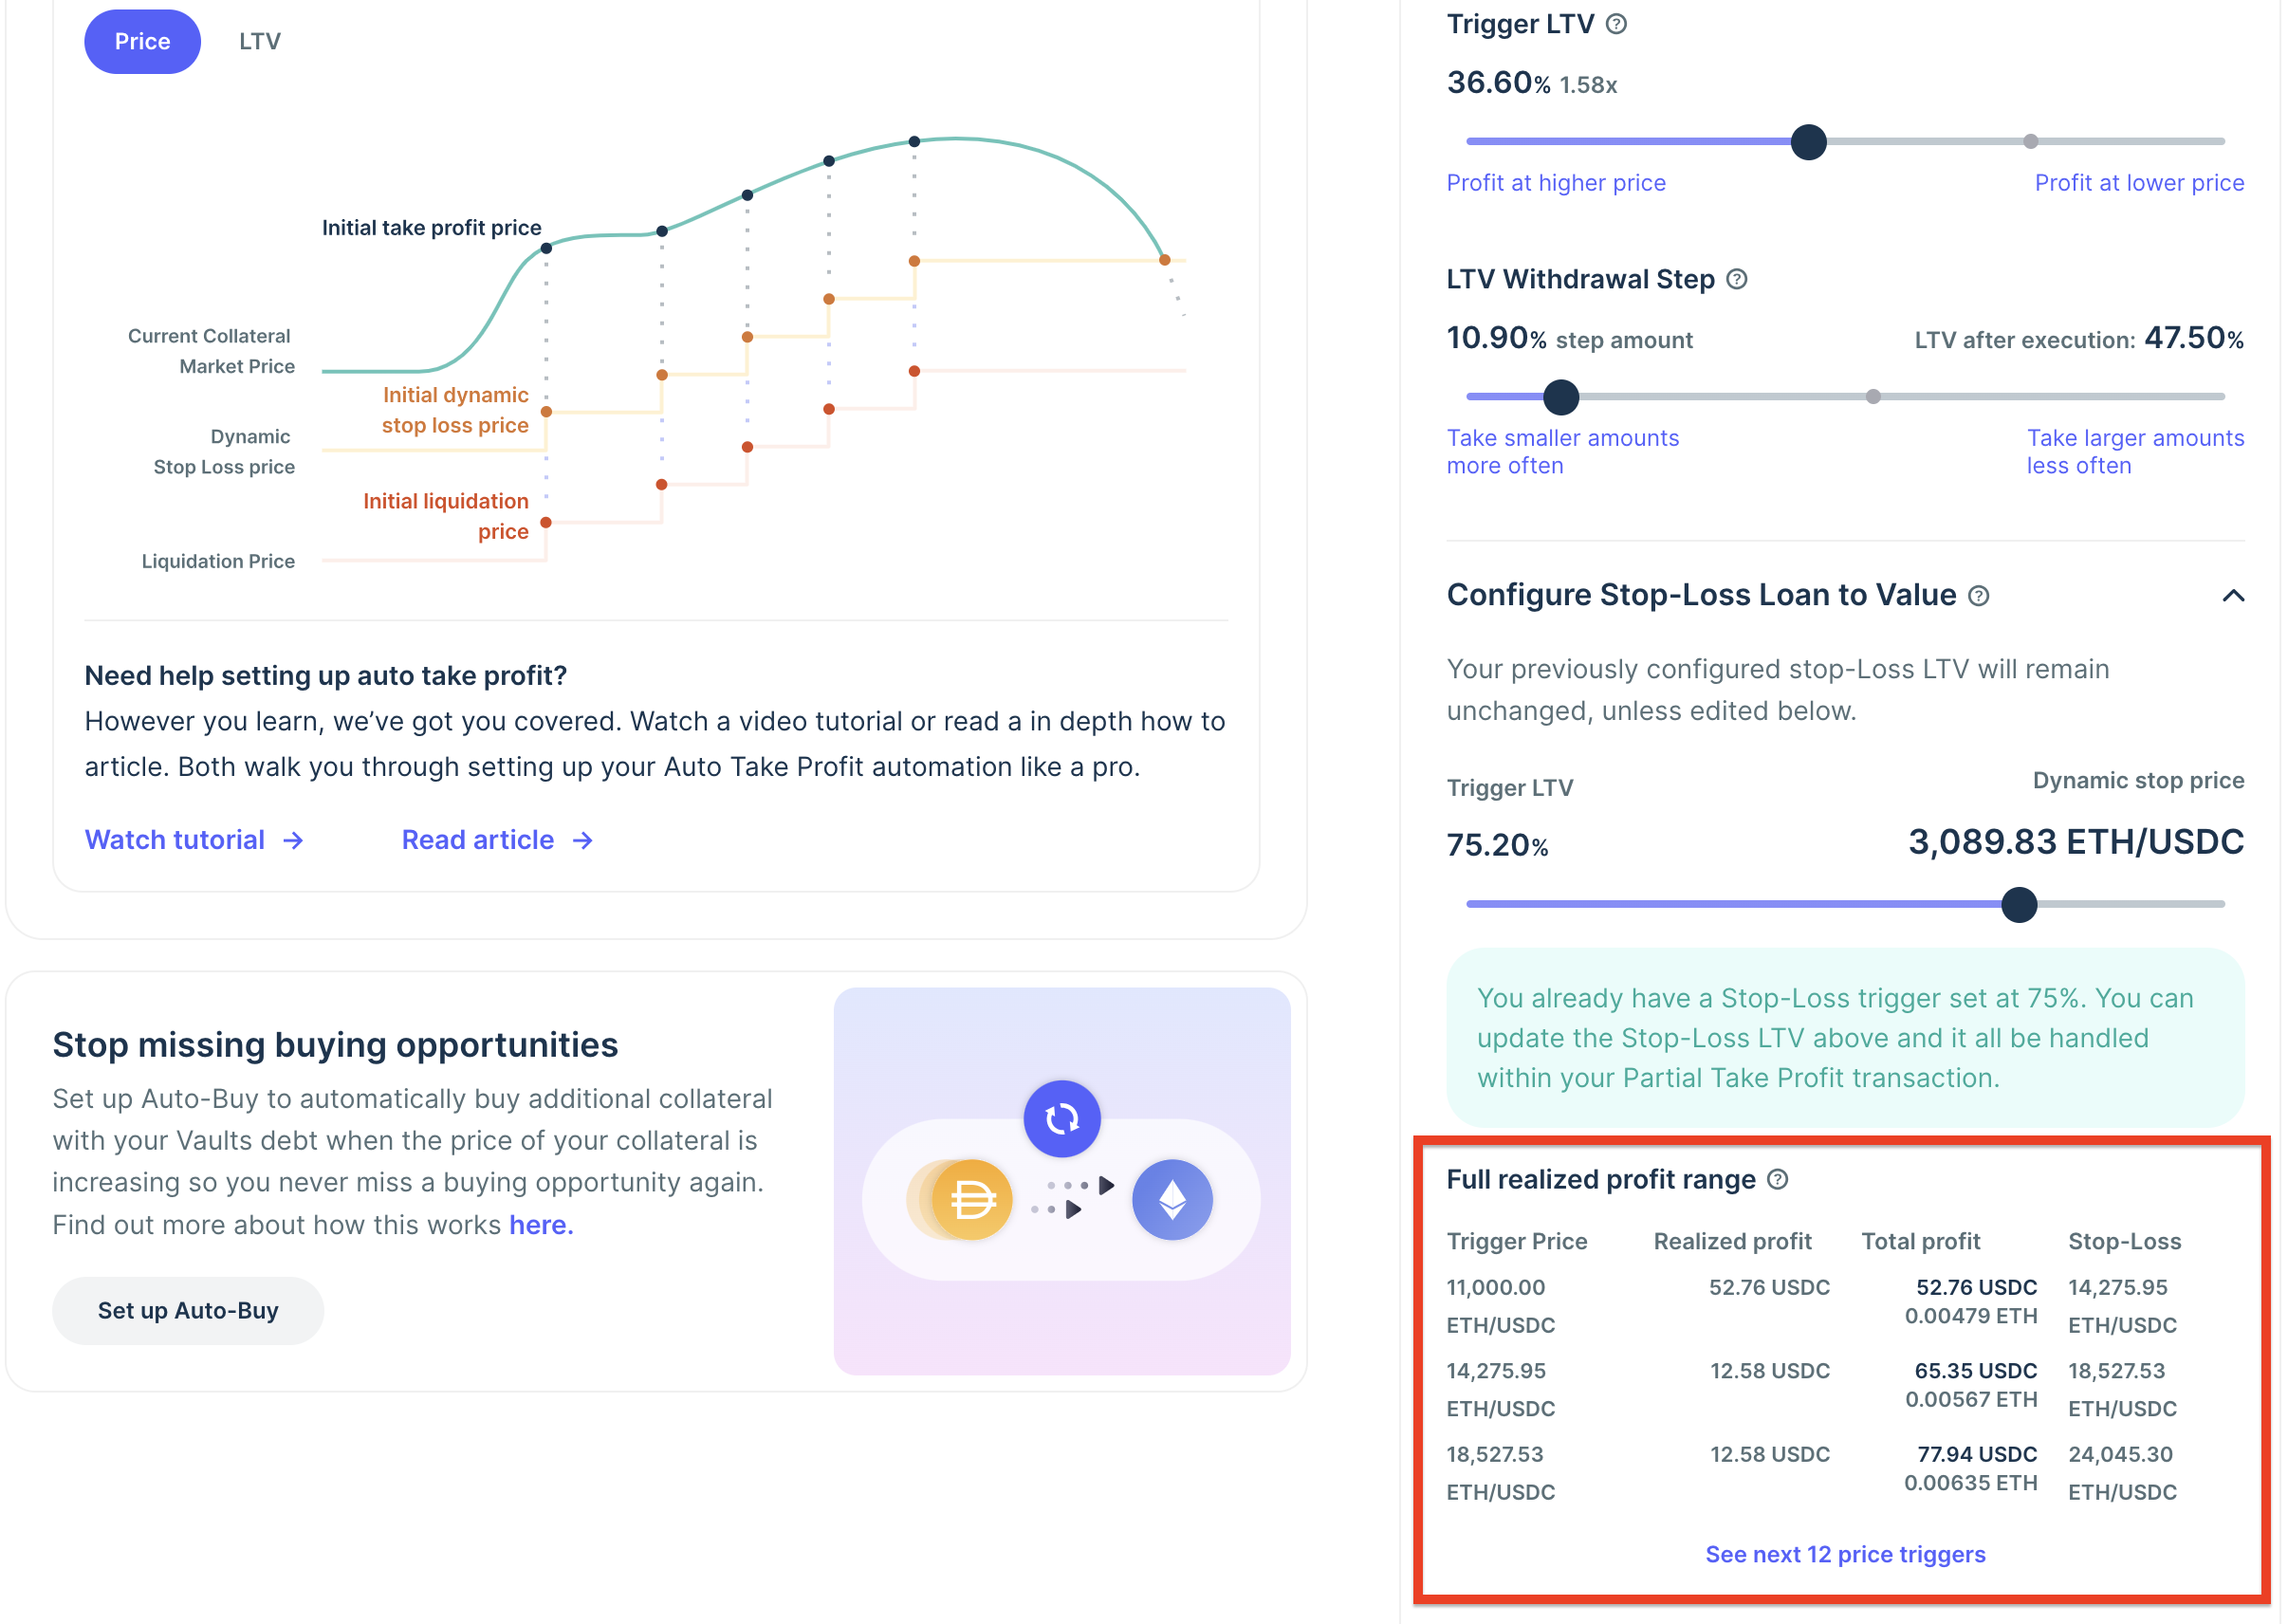
Step 5 - Configure your Trigger LTV for continual profit-taking
After you have set your minimum starting take profit price, you will need to set a Trigger LTV. This constant LTV will determine when you realize profits after your minimum starting take profit price has been reached.
A simple question to help you think about this is: At what LTV or Multiple will I want to consistently realize profits in the future?
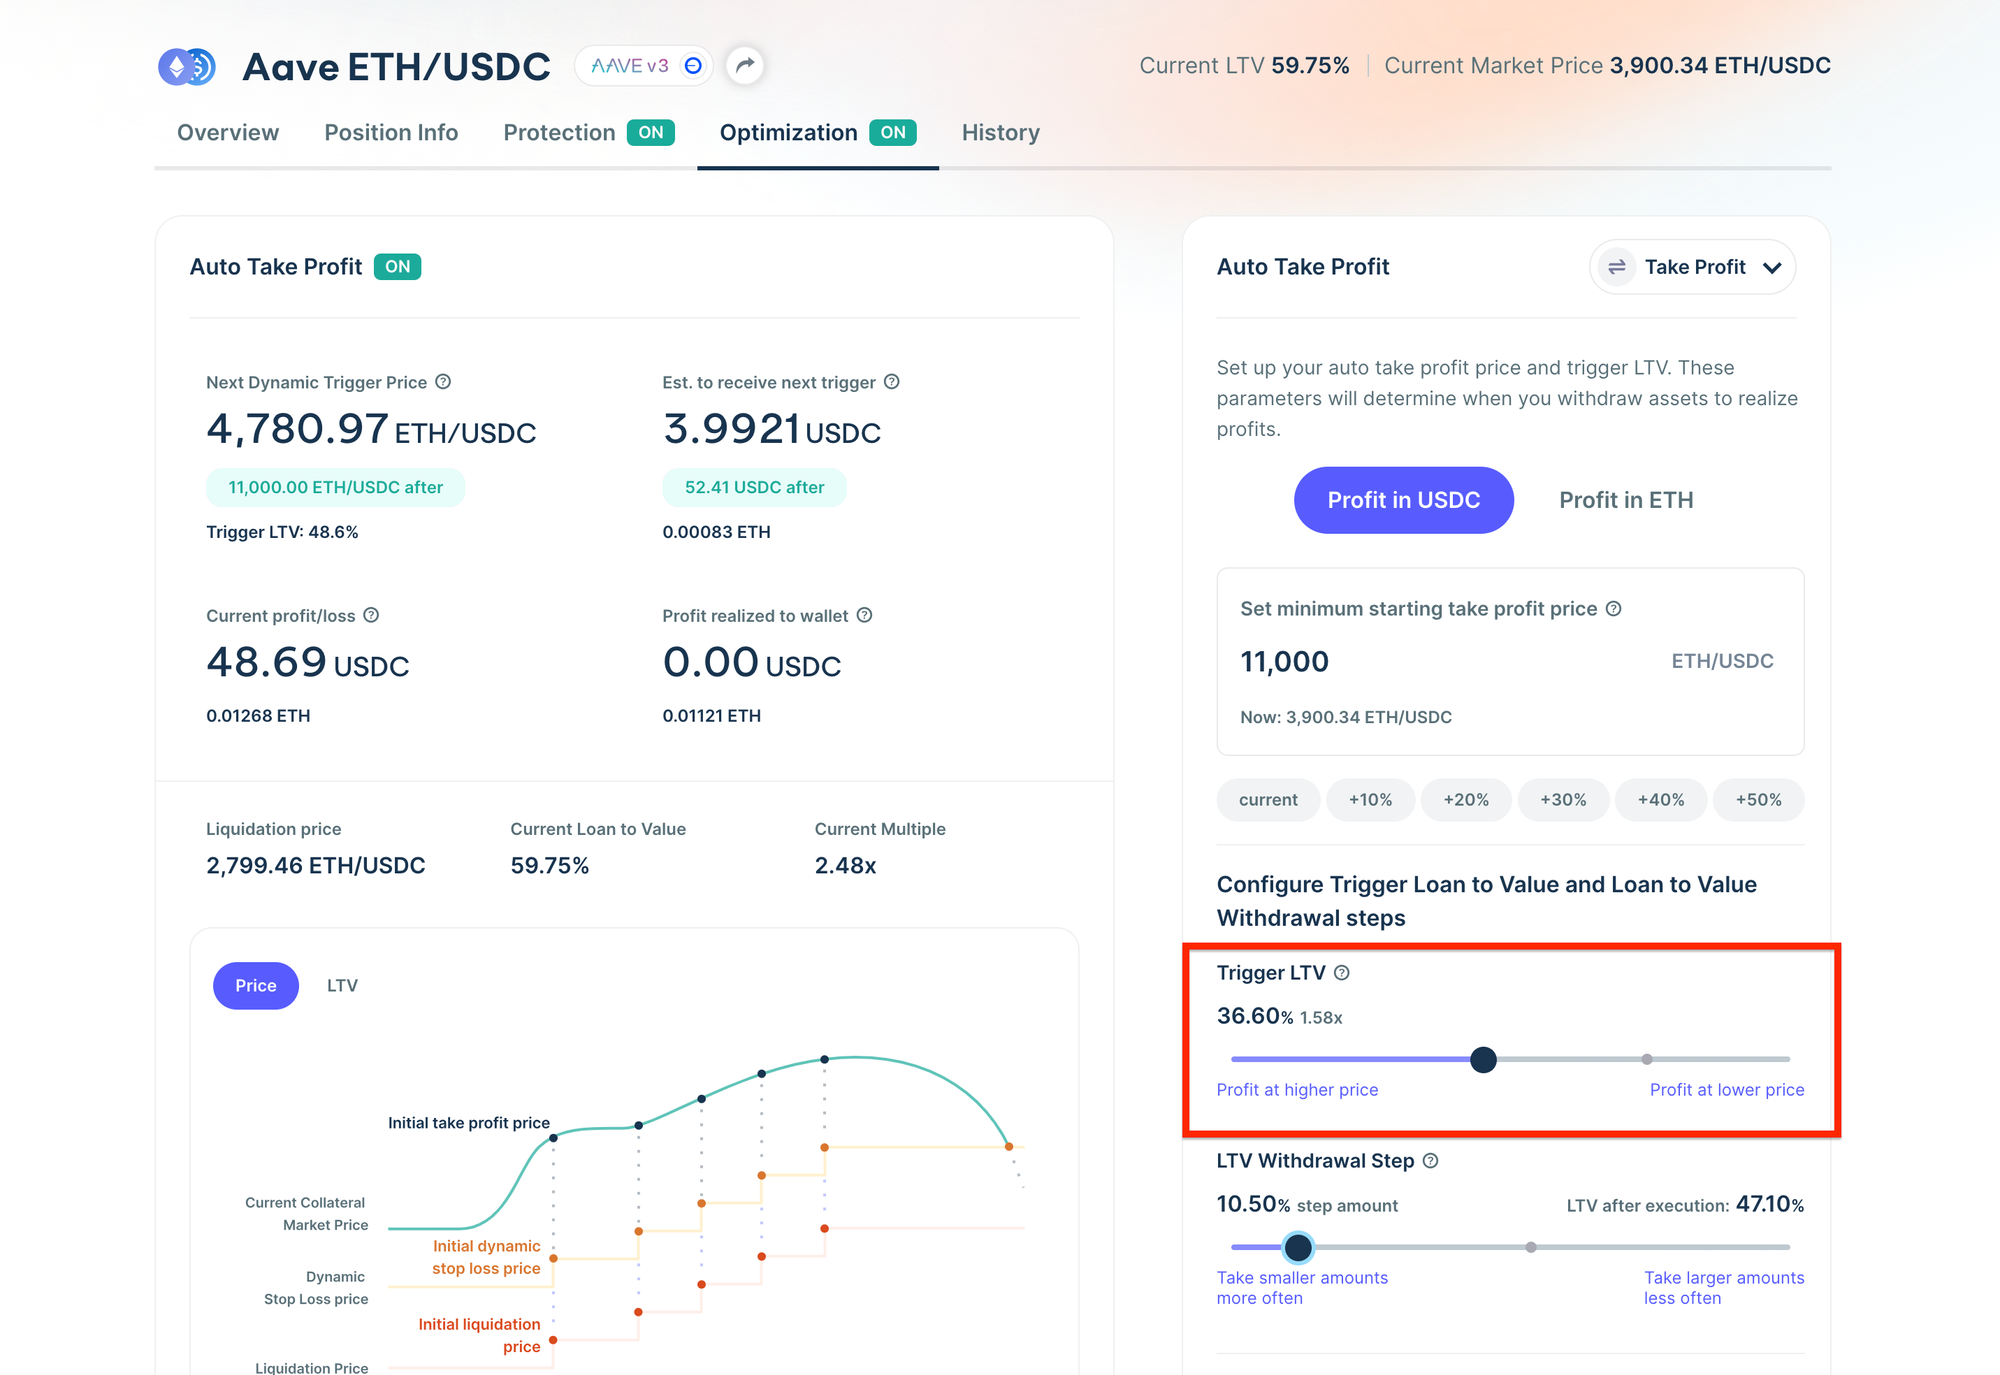
We also provide an LTV diagram that visualizes how the LTV trigger works in the context of other parameters to help you consider this.
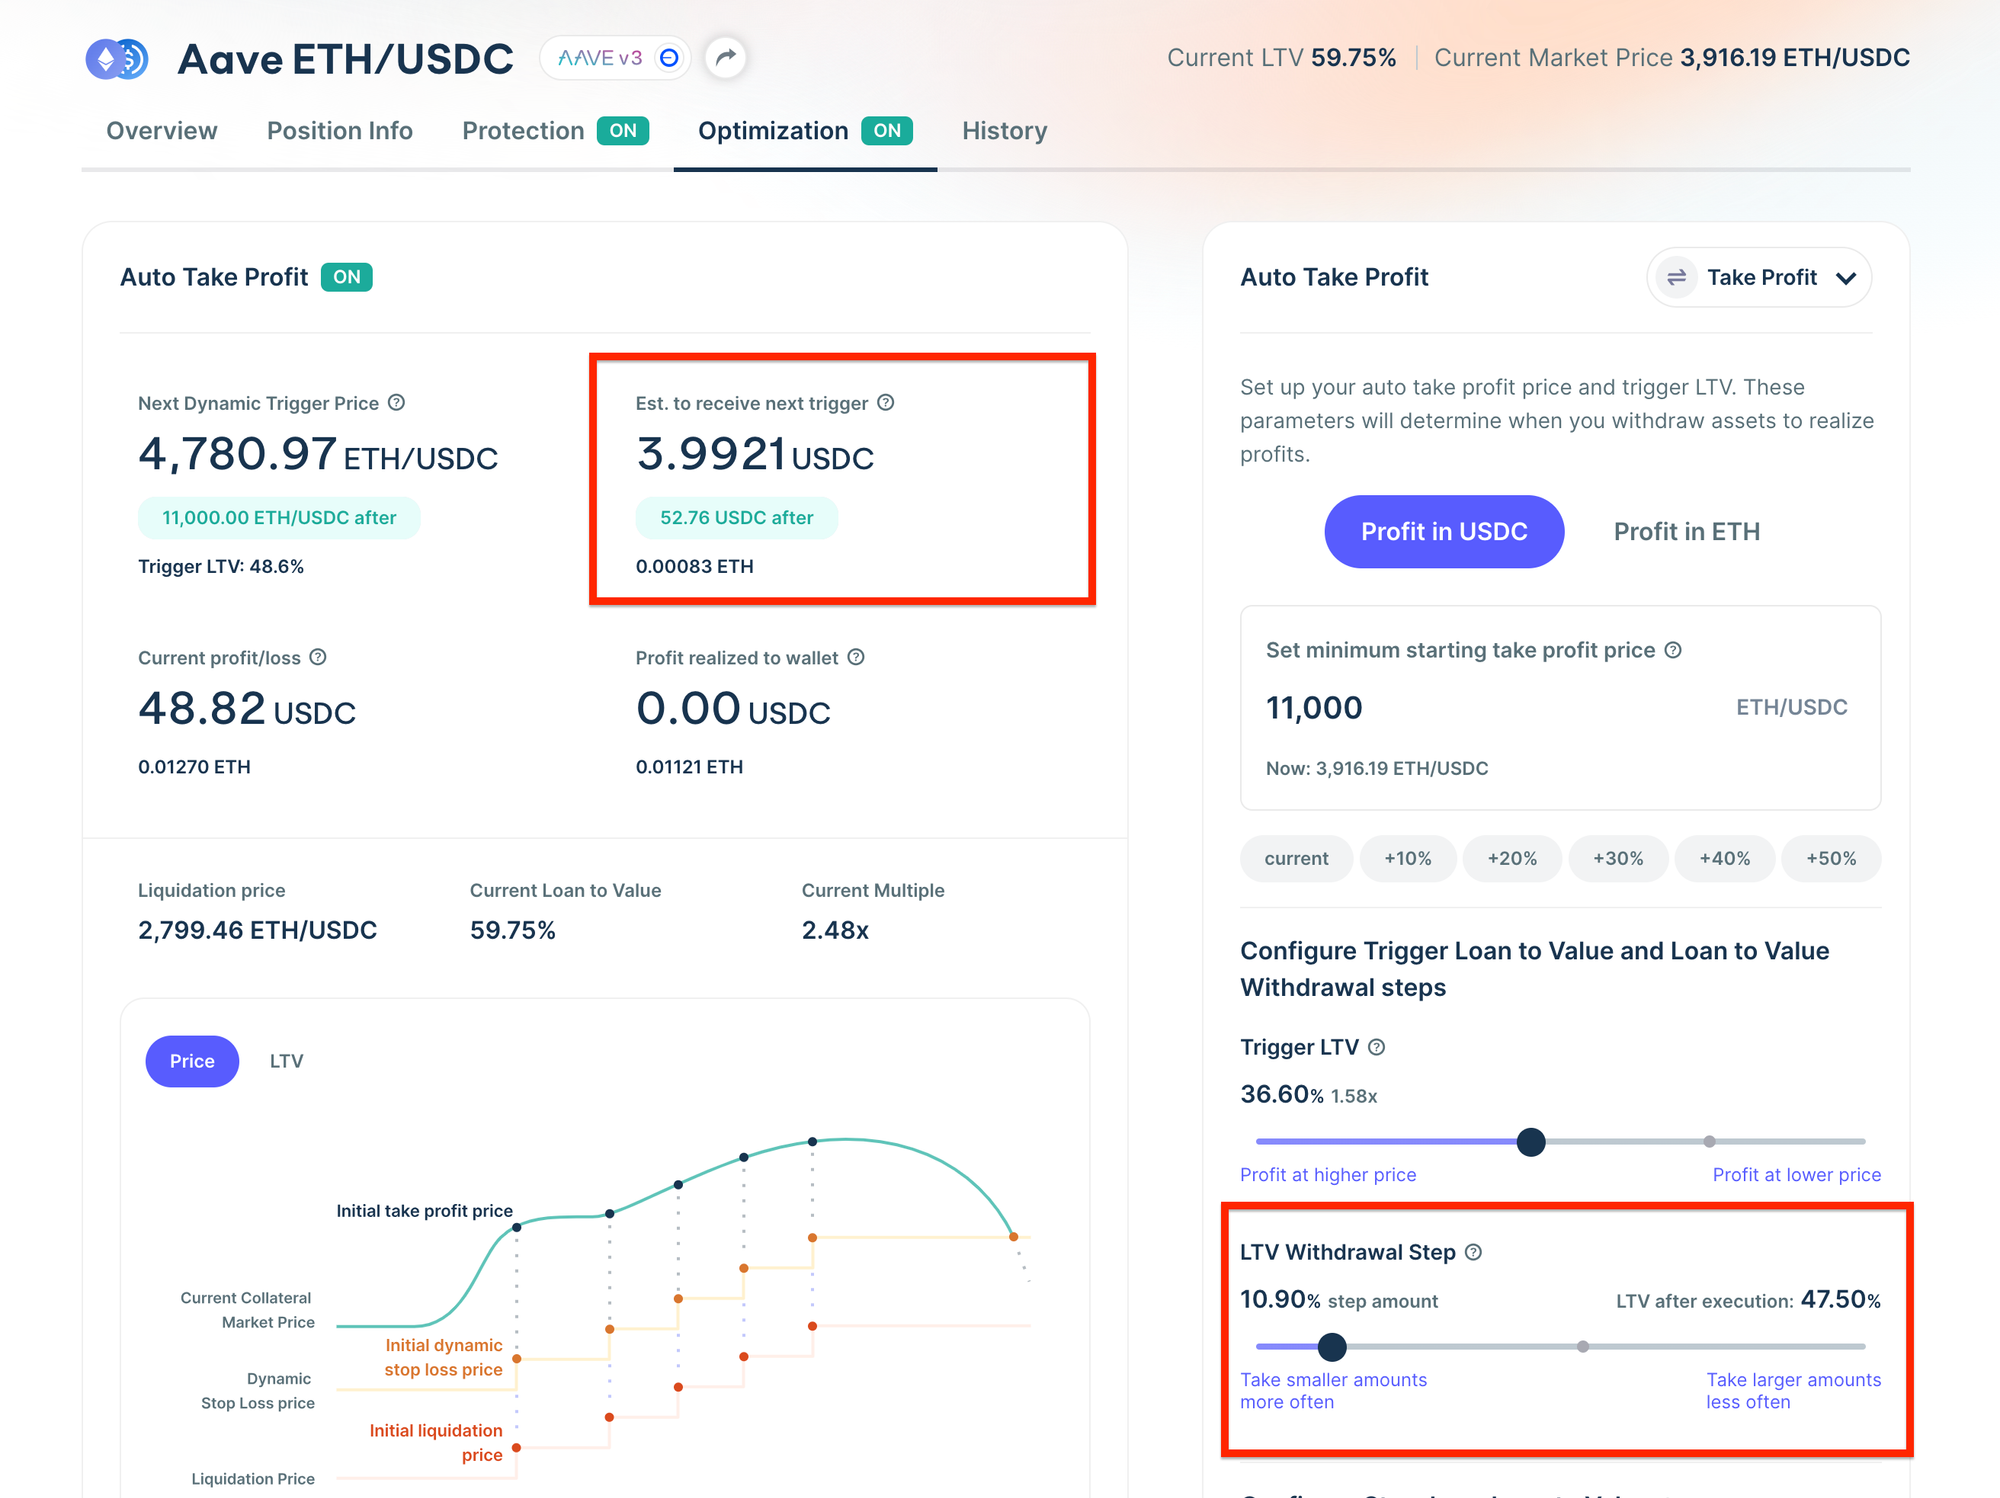
Step 6 - Configure profit size with withdrawal step
After you have set up your minimum starting take profit price, and your LTV trigger, you will need to set up your Withdrawal Step.
Your withdrawal step is percentage amount that your LTV will increase after either your minimum take profit price, or trigger LTV. The higher the percentage, the more profits you will realize, the lower the percentage the lesser profits you will realize.
The default for your withdrawal step is 5%, but you can customize it. You can also play with the slider and monitor how much more or less profit you will realize by looking at the Est. to receive the next trigger on the left-handdouble-check side.
Step 7 - Configure or double-check your Stop Loss LTV
The last configuration step is for your Stop Loss LTV.
If you already have a Stop Loss LTV, it will remain the same by default. If you do not have a Stop Loss set up, you must set one up to use Auto Take Profit.
The simple question that you can ask yourself to help think about it is
- At what LTV and its relative priceDouble-check would I want to be completely out of this market?
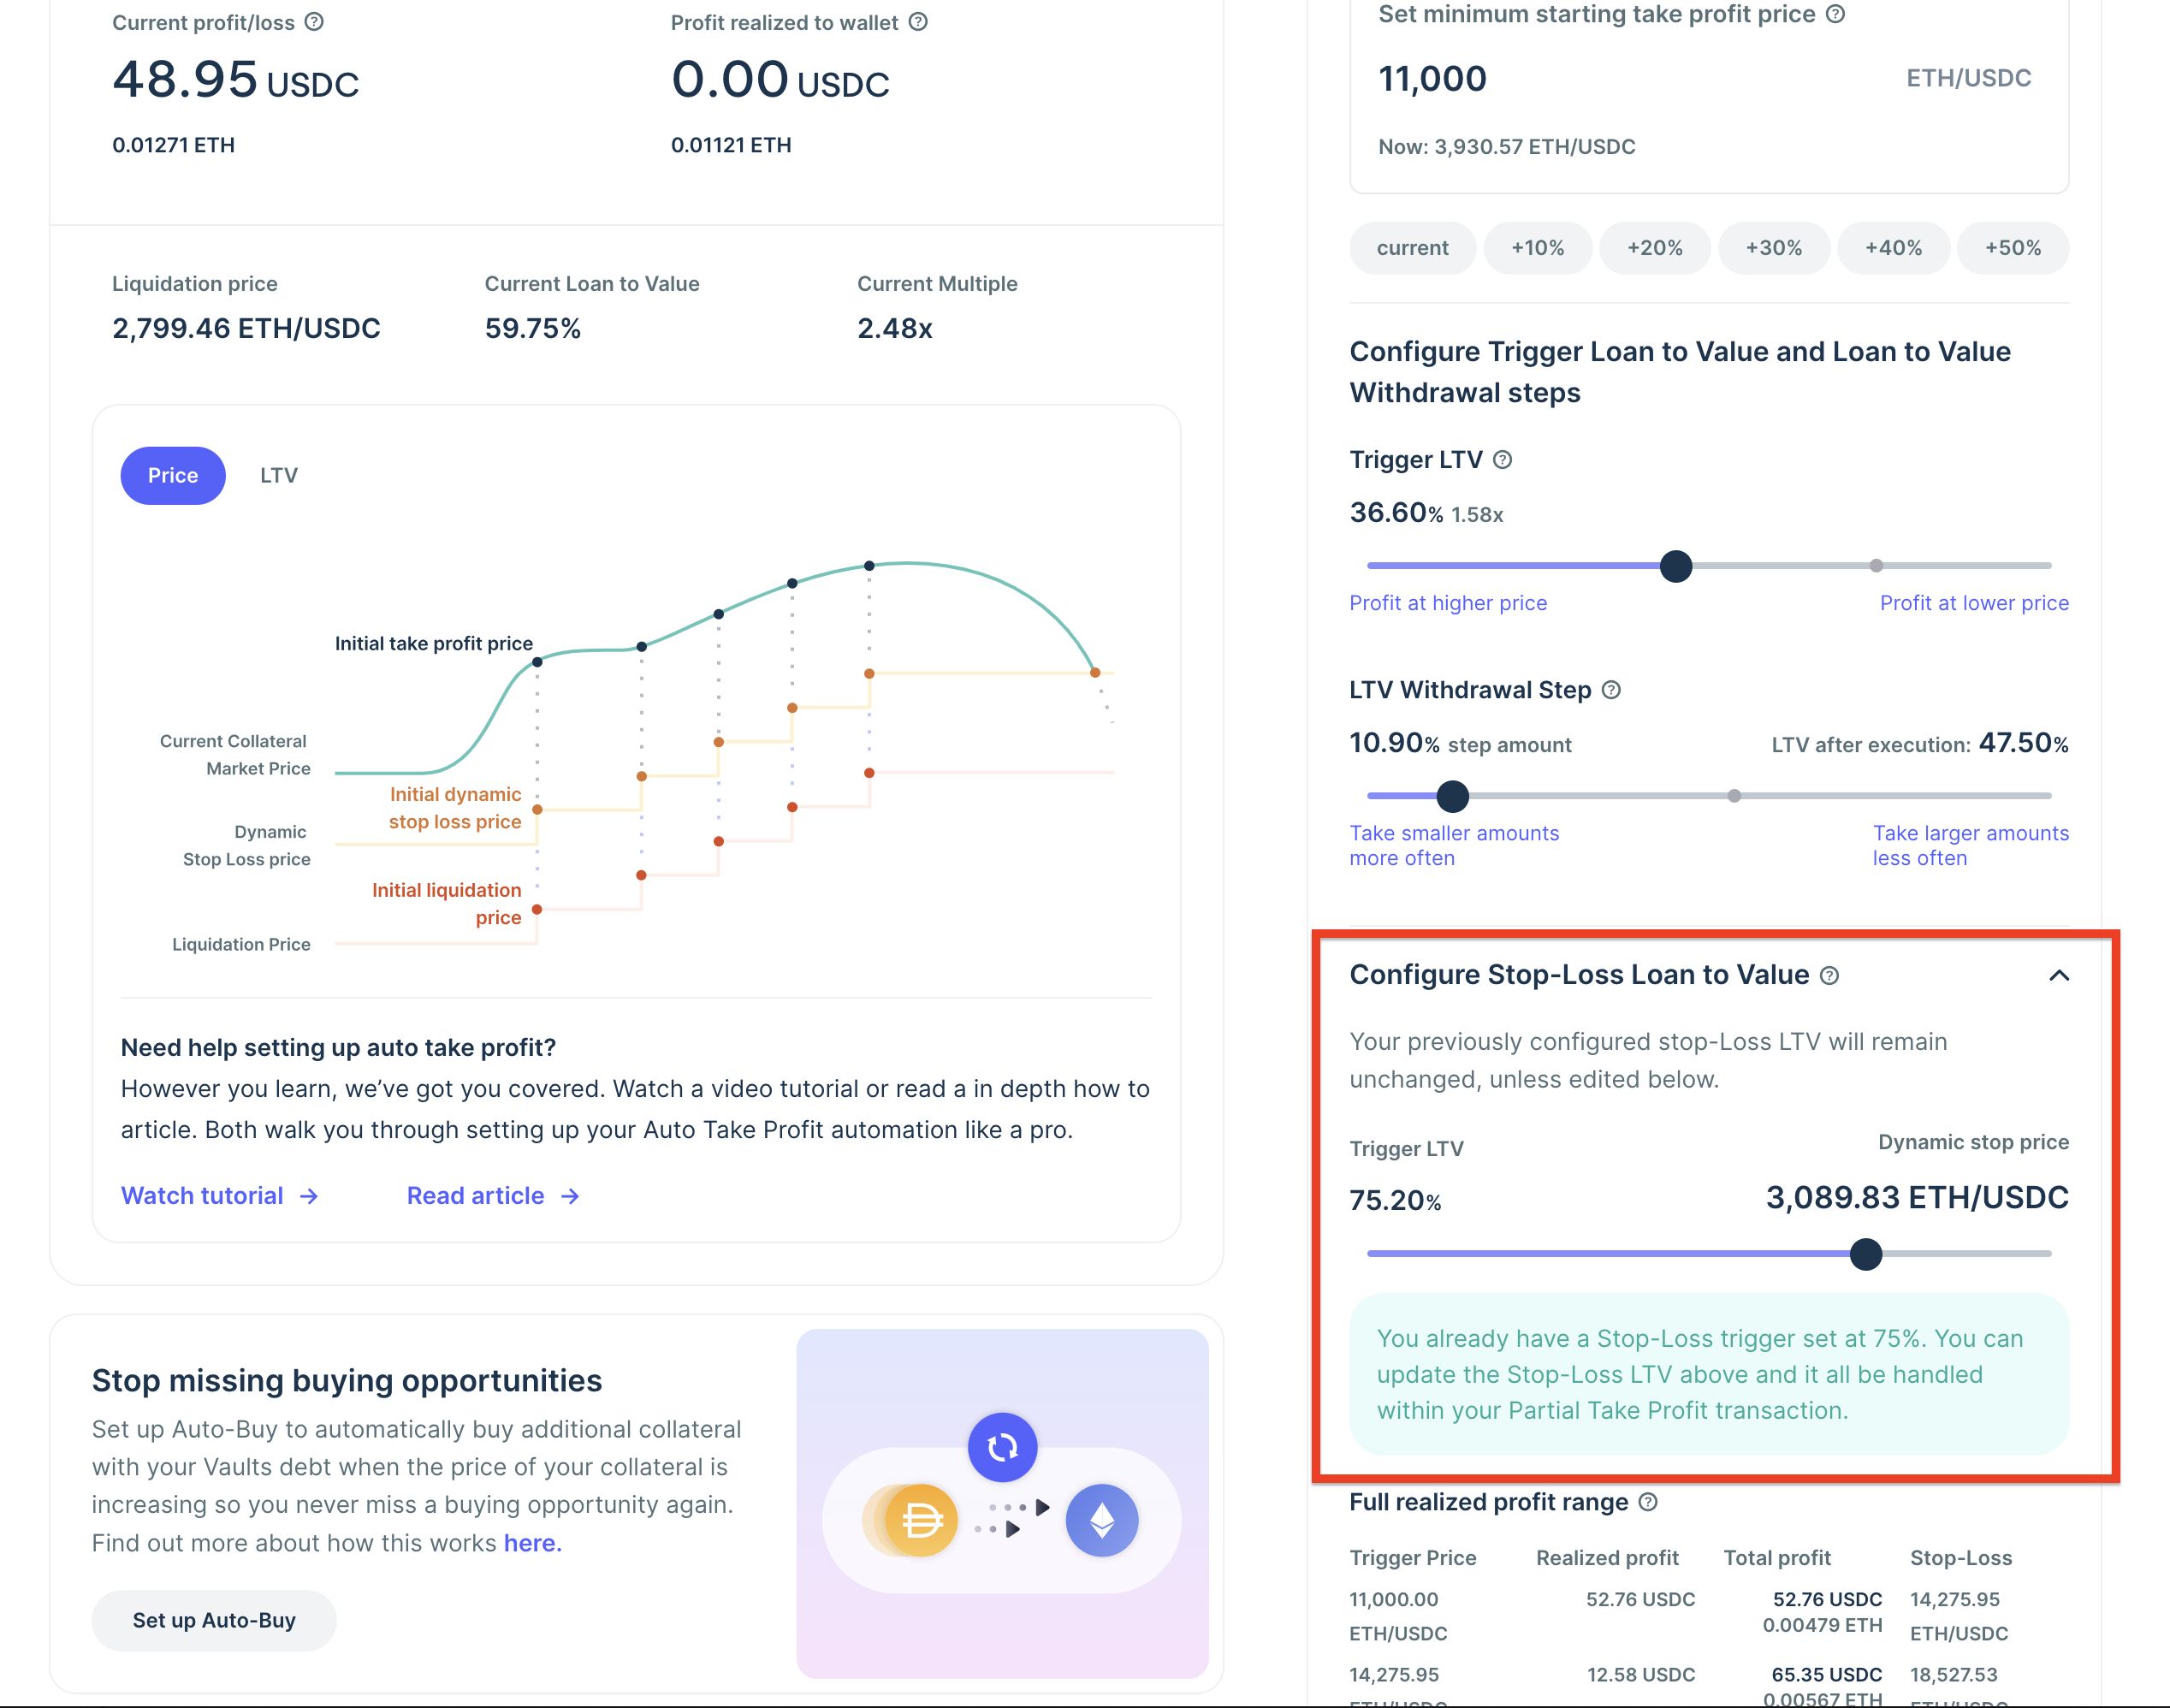
*Note, trailing stop loss is also compatible.
Step 8 - Double-check your realized profit range
Now that you’ve configured your:
- Minimum Starting take profit price - The price at which you will start to realize profits
- Trigger LTV - The continuous LTV level that at you will begin to realize profits
- Withdrawal step - The distance between your trigger LTV and LTV after execution determines thedouble-check amount of profit realized.
- Stop Loss LTV - The LTV that once reached your position will be closed.
You will want to double-check everything, and make sure that your configurations line up with your expected results in the future. You can do that easily with the Full realized profit range. Within it, you can see up to 15 rows of projections for your Trigger Price, Realized Profit, Total Profit, and Stop Loss, Trigger Price, Realized Profit, Total Profit,to click “Confirm” and sign a transaction to solidify the setup and Stop Loss.
Step 9 - Confirm Auto Take Profit with a single transaction
The final step is to click “Confirm” and sign a transaction to solidify the setup of your Auto Take Profit Automation.
Getting in touch
If you have any questions regarding Summer.fi, contact us at support@summer.fi or our social media.